
Turning a grainy photo into copy-and-paste text feels like a little bit of magic, and online OCR makes that possible without installing heavy software. This guide walks through what OCR does, how to prepare images, which tools to try, and practical tips I use every day to speed up document work. If you’ve ever wanted searchable notes from a textbook or editable receipts for expense reports, you’re in the right place.
What OCR does and when to use it
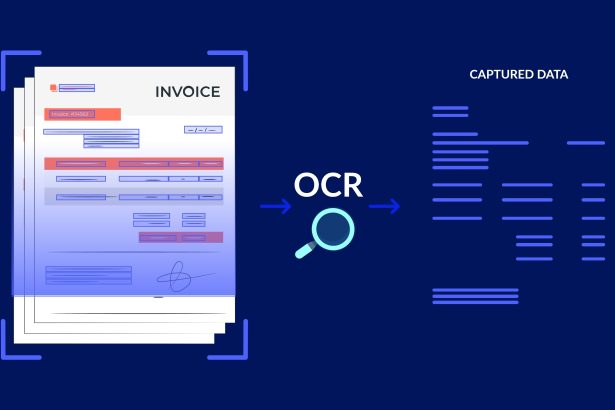
Optical character recognition (OCR) converts the pixels of letters into digital text that you can edit, search, and copy. The technology struggles when the source is blurred, handwritten, or full of decorative fonts, but it excels with clean, high-contrast type. I rely on OCR when I need fast drafts from printed pages or to rescue quotes from old scanned reports without retyping everything.
Online OCR tools run in your browser and often require only a short upload before they return editable files like Word, plain text, or searchable PDFs. They vary by accuracy, supported languages, and layout retention, so the tool you pick should match your document’s needs. For example, I choose services with strong multi-column support for magazine pages and a plain-text export when I plan to run further automated processing.
Prepare your photo for best results
Good results begin with a clean capture: steady camera, even lighting, and a perpendicular angle to the page. Avoid shadows and reflections, crop out irrelevant borders, and make sure the text fills the frame without being clipped. I often take two quick shots—one tight crop for the body text and one wider shot to capture headers—then run both through OCR and compare outputs.
Image resolution matters; aim for at least 300 DPI for printed material when possible, which on a phone typically means holding still and using the highest camera resolution. Increase contrast gently if the text is faint, and convert color photos with heavy backgrounds to grayscale to reduce noise. Save as PNG or high-quality JPEG, since many online tools accept those without recompression artifacts.
How to run an online OCR: a simple workflow
Choose a reputable service and check its supported output formats, then upload your image and pick the target language and format. Most tools let you download a DOCX, TXT, or a searchable PDF; I usually select DOCX when preserving layout matters and TXT for fast data extraction. After download, skim the result to correct misreads, especially numbers, hyphenation, and names that OCR often mangles.
- Scan or photograph the page with good lighting and resolution.
- Crop and adjust contrast as needed, then upload to the OCR site.
- Choose language and output format and run the conversion, then proofread the result.
Batch processing can save time if you have many pages—look for services that accept ZIP uploads or folders. For recurring tasks, several online tools offer APIs so you can automate the workflow, a step I adopted when digitizing archived newsletters for a local nonprofit. Automation cut my manual editing time by more than half.
Compare tools: quick features at a glance
| Feature | Free tools | Paid/Pro services |
|---|---|---|
| Accuracy | Good for clear print | Higher, with layout retention |
| Batch processing | Limited | Robust, includes APIs |
| Privacy | Variable | Often offers encryption and deletion options |
Free sites are great for one-off jobs or casual use, but if you handle invoices, legal documents, or sensitive material regularly, a paid plan with guaranteed retention policies and encryption is worth considering. Look for services that display sample outputs and offer a trial so you can test accuracy on your typical documents. I switch between a lightweight free tool for quick notes and a paid service for client work that requires precise formatting.
Fixing common OCR problems
OCR usually stumbles on decorative fonts, curved text, and handwriting; for those, manual correction is unavoidable. Use the original image as a reference and search the converted text for odd characters, misplaced line breaks, and numbers turned into letters—common mistakes include 0/O, 1/I, and l/1 confusions. If layout is important, compare the DOCX against the original and fix alignment and tables in the editor.
When text is in multiple columns or contains tables, choose a tool that advertises layout retention, and export to a format that preserves structure like DOCX or PDF with OCR. If the tool merges columns, you can often reflow the text by pasting into a plain-text editor and manually reconstructing paragraphs. For handwriting, consider services specifically trained on cursive or use human-assisted transcription if accuracy is critical.
Security, privacy, and workflow best practices
Treat sensitive documents cautiously: prefer services that delete files after processing or run OCR locally if the platform offers a desktop client. Read privacy policies and check whether data is used to improve OCR models; some free services store uploads for training purposes. For my freelance work, I always ask clients for permission before uploading contracts and use end-to-end encrypted storage for any archived originals.
Keep a simple proofreading checklist: check numerals, names, headers, and table cells first, then scan for formatting quirks like odd hyphenation and missing diacritics. Maintain an exported OCR archive in searchable PDF form so you can quickly retrieve and verify content later. Over time, this habit has saved me hours when digging up quotes or receipts for tax time.
Ready to convert your photos?
Start with a single, well-shot page to test a tool’s accuracy before committing a large batch, and try both DOCX and plain-text outputs to see which requires less cleanup. Keep pragmatic expectations—modern online OCR is impressive, but human proofreading remains the quickest route to a truly polished document. With a little practice, you can turn stacks of paper and photos into usable, editable text in minutes and reclaim hours spent on typing.